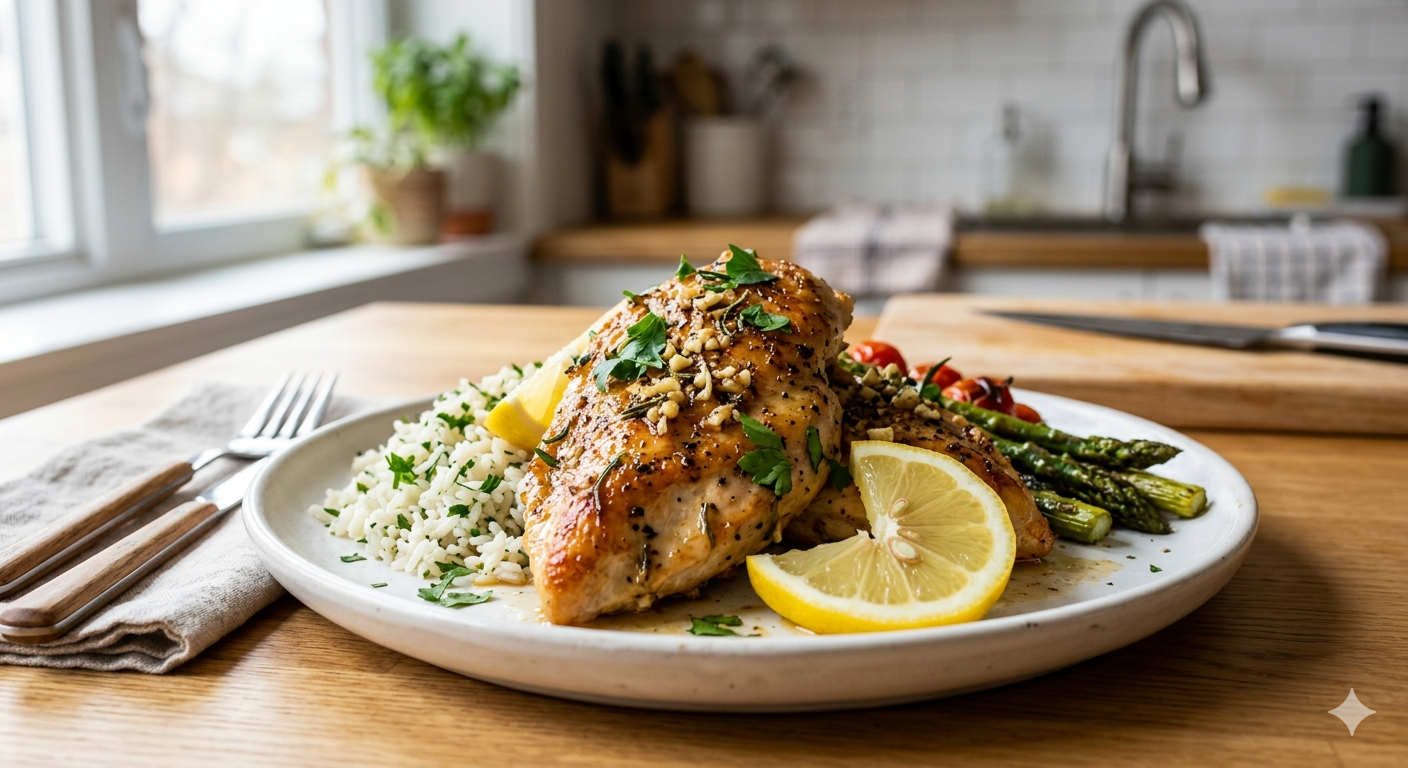
I still remember the evening I first made this recipe. It was a Tuesday — I had just walked through the door after a long day, my kids were already asking what was for dinner, and I had exactly zero energy to do anything complicated. I opened the fridge, found two chicken breasts, spotted a lemon on the counter, and thought — right, let’s figure this out.
Twenty minutes later, I had the most surprisingly delicious pan-seared garlic lemon chicken sitting on the table. My husband took one bite and said “you need to make this again.” And I have. Almost every single week since.
This quick chicken dinner in 20 minutes has become my most-used weeknight recipe, and I genuinely believe it will become one of yours too. It is golden, juicy, packed with garlic and lemon flavor, and made entirely in one pan. No marinating, no complicated techniques, no long ingredient lists — just real food on the table fast.
Why This Quick Chicken Dinner Works So Well
I have tried a lot of “20 minute chicken recipes” over the years and most of them disappoint me. Either they are not actually ready in 20 minutes, or they cut so many corners that the flavor suffers. This one is different — and here is why.
The secret is in three things: a properly hot pan, garlic added at exactly the right moment, and a splash of lemon juice at the very end. Getting these three things right is the difference between bland pan-cooked chicken and something that genuinely tastes like it came from a restaurant kitchen.
I learned the garlic lesson the hard way, by the way. I used to throw it in at the start with the oil, and it would burn before the chicken was even halfway done. Bitter, dark, not great. Adding it in the very last minute of cooking — when the heat is lower and the chicken is already cooked — keeps it sweet, golden, and fragrant. It changed everything.
Ingredients
- 2 boneless skinless chicken breasts (approximately 400g)
- 2 tablespoons olive oil
- 3 cloves garlic, minced
- 1 teaspoon smoked paprika
- 1 teaspoon Italian seasoning
- 1 teaspoon salt
- 1/2 teaspoon black pepper
- 1 tablespoon fresh lemon juice
- Fresh parsley, chopped for garnish
- Lemon wedges for serving
Instructions
Step 1: Pat the chicken breasts completely dry with paper towels on both sides. If the breasts are thick, slice them horizontally to create thinner cutlets — this ensures they cook through in 20 minutes without drying out.
Step 2: Season both sides of the chicken generously with smoked paprika, Italian seasoning, salt, and black pepper. Press the seasoning firmly into the meat.
Step 3: Heat the olive oil in a large skillet over medium heat for 1 to 2 minutes until shimmering. The pan must be properly hot before the chicken goes in.
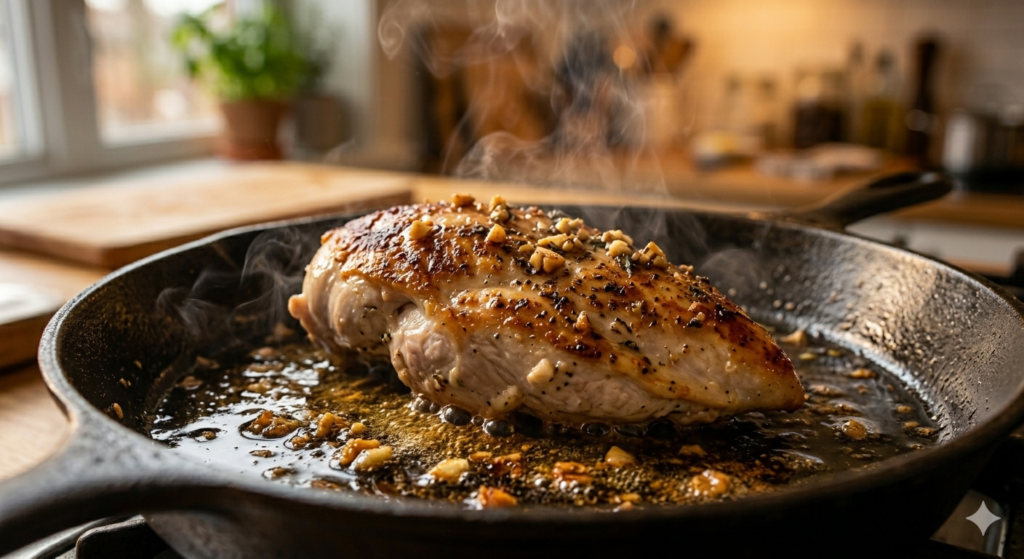
Step 4: Place the chicken breasts in the pan and cook for 5 to 6 minutes on the first side without moving them. Let the golden crust develop completely before flipping.
Step 5: Flip and cook for another 5 to 6 minutes on the second side until fully cooked through. The internal temperature must reach 74°C (165°F) at the thickest point.
Step 6: Add the minced garlic to the pan and cook for 1 minute, stirring it into the oil around the chicken. Continuously spoon the garlicky pan juices over the top of the chicken to baste it.
Step 7: Drizzle the lemon juice over the chicken and cook for a final 1 minute. Remove from heat immediately.
Step 8: Rest the chicken for 2 to 3 minutes before serving. Garnish with fresh parsley and serve with lemon wedges alongside your choice of rice, pasta, or salad.
Notes
Thin chicken breasts cook much faster and more evenly than thick ones — slice them horizontally if needed or use a meat mallet to flatten slightly. Never add garlic at the start of cooking — it burns within minutes and turns bitter. Always add it in the last 1 to 2 minutes only. A properly hot pan is essential — if the oil is not shimmering before the chicken goes in, it will steam instead of sear. Always use a meat thermometer — 74°C (165°F) is the safe internal temperature for chicken breast. For a richer version, swap olive oil for butter and add a tablespoon of heavy cream after removing the chicken to make a quick pan sauce. Add chili flakes with the garlic for a spicy version, or a teaspoon of honey with the lemon juice for a sweet and tangy glaze. Leftovers keep in the fridge for up to 4 days — slice cold over salads or reheat gently in a pan with a splash of water.
Ingredients
This is all you need — nothing unusual, nothing that requires a special trip to the shops:
- 2 boneless skinless chicken breasts (around 400g total)
- 2 tablespoons olive oil
- 3 cloves garlic, minced
- 1 teaspoon smoked paprika
- 1 teaspoon Italian seasoning
- 1 teaspoon salt
- ½ teaspoon black pepper
- 1 tablespoon fresh lemon juice
- Fresh parsley, chopped, for garnish
- Lemon wedges for serving
I almost always have all of these in the kitchen already. If you swap the smoked paprika for regular paprika it still works — smoked just gives a slightly deeper, richer flavor that I prefer.
Equipment You Will Need
- A large skillet or frying pan — cast iron if you have it, but any heavy pan works
- Kitchen tongs
- A meat thermometer (I know, I know — but it genuinely takes the guesswork out of it)
- Paper towels
- A cutting board and knife
How to Make a Quick Chicken Dinner in 20 Minutes
Step 1 — Prepare the Chicken
Take the chicken out of the fridge about 10 minutes before you cook it. I used to skip this step and wonder why my chicken was cooking unevenly — bringing it closer to room temperature makes a real difference.
Pat both sides of each breast completely dry with paper towels. This is honestly the step that most people skip and they really should not — dry chicken sears beautifully, wet chicken steams and goes pale and soft. Not what we want.
If your chicken breasts are on the thicker side — more than about 2.5 cm — slice them horizontally into thinner cutlets. This is how you guarantee they cook through in 20 minutes without burning the outside. Season both sides generously with the smoked paprika, Italian seasoning, salt, and pepper. Press it in with your hands so it sticks properly.
Step 2 — Heat the Pan
Pour the olive oil into your pan and set it over medium heat. Give it 1 to 2 minutes to get properly hot — you want to see the oil shimmering before the chicken goes anywhere near it.
A cold pan is a recipe for chicken that sticks and steams instead of sears. Be patient here — those 2 minutes matter.
Step 3 — Cook the Chicken
Place the chicken breasts smooth side down into the hot pan and then — this is important — do not touch them. No poking, no pressing, no lifting to peek underneath. Just let them cook undisturbed for 5 to 6 minutes.
You will know they are ready to flip when they release naturally from the pan without any resistance. If they are sticking, they are not ready yet — give them another 30 seconds.
Flip and cook for another 5 to 6 minutes on the second side. The internal temperature should reach 74°C (165°F) at the thickest point — use your thermometer here, it takes 3 seconds and takes all the anxiety out of cooking chicken.
Step 4 — Add the Garlic
Now comes the part that makes this quick chicken dinner taste like something special. Reduce the heat to medium-low, add the minced garlic to the pan, and stir it into the oil around the chicken. Spoon those garlicky juices over the top of the chicken continuously for about 1 minute.
Your kitchen is going to smell absolutely incredible at this point. Fair warning.
Step 5 — Finish With Lemon
Drizzle the lemon juice over both chicken breasts and let everything bubble together for one final minute. The lemon lifts the pan and picks up all those delicious browned bits from the bottom — it is doing a lot of flavor work in a short amount of time.
Take the pan off the heat immediately after this step. Done.
Step 6 — Rest, Then Serve
Transfer the chicken to a plate or cutting board and let it rest for 2 to 3 minutes before you cut into it. I know it is tempting to dive straight in — believe me, I do it too sometimes — but resting keeps all those juices inside the meat where they belong. Cut too early and they all run out onto the board.
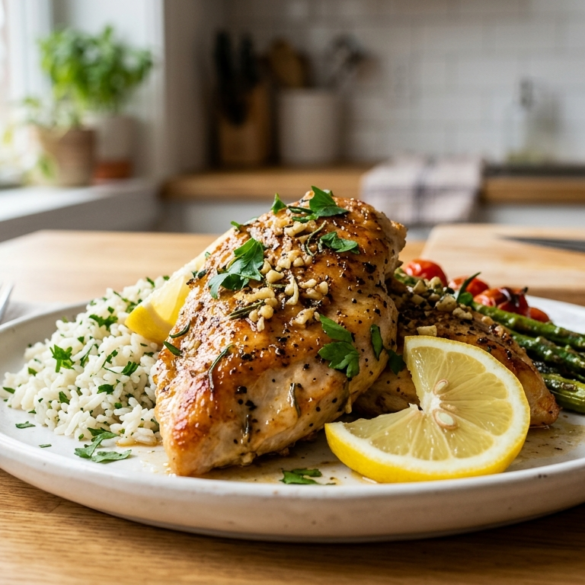
Scatter fresh parsley over the top, add lemon wedges on the side, and dinner is ready.
My Best Tips for This Recipe
After making this quick chicken dinner in 20 minutes more times than I can count, here is what I have learned:
Dry the chicken — every single time. I cannot stress this enough. It takes 10 seconds with a paper towel and it completely changes the result.
Thin and even beats thick and uneven. If one breast is thick and one is thin, they will never cook at the same rate. Slice or flatten the thick one before you season it.
One pan, no overcrowding. If you are feeding four people, cook in two batches. It feels slower but it is actually faster than trying to manage four crowded, steaming chicken breasts.
Garlic at the end — always. I ruined so many meals before I learned this. The end, not the beginning.
Get a meat thermometer. They cost very little and they remove all the stress from cooking chicken. 74°C (165°F) and you are done. Simple.
Rest before cutting. Two minutes. That is all it takes to keep the chicken juicy instead of dry.
Serving Ideas
This is where it gets fun, because this quick chicken dinner works with almost anything you have in the kitchen:
With rice — my go-to on weeknights. Spoon the pan juices over the rice and it turns simple steamed rice into something really satisfying. My kids eat every last bite.
With pasta — slice the cooked chicken and toss it through spaghetti or penne with a little butter, pasta water, and Parmesan. Dinner for four in 25 minutes total.
Over a salad — let the chicken cool for 5 minutes, slice it thinly, and lay it over mixed greens with cherry tomatoes and a lemon vinaigrette. Light, fresh, and genuinely filling.
With roasted vegetables — after removing the chicken, throw broccoli florets or sliced zucchini straight into the same pan with the leftover garlic and lemon. Cook for 4 to 5 minutes and you have a complete meal with almost no washing up.
In a wrap or sandwich — leftover cold chicken the next day in a toasted wrap with lettuce, tomato, and mayo is one of my favorite quick lunches. It reheats beautifully too.
Variations Worth Trying
Once you have the base recipe down, these variations take about 30 seconds of extra effort and completely change the character of the dish:
Spicy version — add ½ teaspoon of chili flakes to the pan along with the garlic. A dash of hot sauce with the lemon juice takes it up another level. My husband’s personal favorite.
Creamy garlic version — after removing the chicken, pour 3 tablespoons of heavy cream into the pan and stir over low heat for 1 to 2 minutes. You get the most effortless, silky garlic cream sauce. Pour it straight over the chicken and serve with pasta or mashed potatoes.
Honey lemon version — add 1 tablespoon of honey along with the lemon juice in the final step and let it bubble into a sticky glaze. Sweet, tangy, and absolutely gorgeous. This one goes down particularly well with kids.
Butter basted version — swap olive oil for 2 tablespoons of butter and add a sprig of fresh rosemary to the pan with the garlic. Spoon that foaming herb butter over the chicken for the last 2 minutes of cooking. It tastes like something from a proper restaurant and takes zero extra effort.
How to Know When Your Chicken Is Cooked
This question comes up so often and I completely understand the anxiety around it — undercooked chicken is a genuine food safety concern, but overcooked chicken is dry and disappointing. Here is how I handle it:
The most reliable method is a meat thermometer. Stick it into the thickest part of the breast — not touching the pan — and look for 74°C (165°F). That is your number. Below it and it needs more time. At it, pull it off the heat immediately.
If you do not have a thermometer, press the thickest part of the breast firmly with your finger. Fully cooked chicken feels firm and springs back. Raw or undercooked chicken feels soft and squishy. You can also make a small cut at the thickest point — the juices should run completely clear and the flesh should be fully white with no pink anywhere.
Honestly though — just get a thermometer. I resisted for years and I have no idea why. It costs very little and completely removes the guesswork from cooking chicken.
How to Store and Reheat Leftovers
In the fridge: Store cooked chicken in an airtight container for up to 4 days. Keep it whole rather than sliced — it stays much juicier that way.
In the freezer: Wrap each breast tightly in plastic wrap, then pop them in a freezer bag. They keep well for up to 3 months. Thaw overnight in the fridge before reheating.
Reheating: The best way is in a skillet over medium-low heat with a small splash of water or chicken broth and a knob of butter, lid on, for 3 to 4 minutes. Avoid blasting it in the microwave on high — it keeps cooking the chicken and turns it rubbery. Low and slow is the way to go.
Nutrition Information (Per Serving)
| Nutrient | Per serving |
|---|---|
| Calories | 300 kcal |
| Protein | 30g |
| Fat | 15g |
| Saturated Fat | 2.5g |
| Carbohydrates | 3g |
| Fiber | 0.5g |
| Sodium | 520mg |
Chicken breast is one of the leanest proteins out there — high in quality protein, low in saturated fat, and genuinely filling. Cooked in olive oil rather than butter or cream, this dish is a solid choice for anyone trying to eat well without giving up on flavor.
Frequently Asked Questions
Can I use chicken thighs instead of breasts? Absolutely — and honestly, boneless skinless chicken thighs are even more forgiving than breasts because they are naturally higher in fat. They stay juicy even if you cook them a minute or two longer than ideal. Add about 1 extra minute per side and check for the same 74°C (165°F) internal temperature.
Do I need to marinate the chicken? Not for this recipe — the dry seasoning pressed directly onto the chicken creates plenty of flavor in the pan. That said, if you want to prep ahead, you can apply the seasoning up to 24 hours in advance and keep the chicken covered in the fridge. It actually tastes even better the next day.
What is the best pan for this recipe? Cast iron is my favorite — it holds heat incredibly evenly and gives you the most consistent golden crust. Stainless steel is a close second. Non-stick works fine but gives a slightly less impressive sear — just increase the heat a touch to compensate.
Can I add vegetables to the same pan? Yes — and this is one of my favorite tricks for keeping washing up minimal. After removing the cooked chicken, add broccoli, cherry tomatoes, spinach, or sliced zucchini directly into the pan with the leftover garlic and lemon. Cook for 3 to 5 minutes and they pick up all that flavor from the pan. Dinner and side dish done together.
Is this recipe suitable for meal prep? It is one of my most-used meal prep recipes. Cook 4 to 6 breasts at once, let them cool completely, and store in airtight containers in the fridge for up to 4 days. Slice cold over salads, reheat for rice bowls, or roll into wraps for a quick lunch. Genuinely one of the most versatile meal prep proteins you can make.
Final Thoughts
If there is one recipe I would tell every busy person to learn first, it is this one. A quick chicken dinner in 20 minutes that actually tastes good is not a compromise — it is a skill. And once you have made this a few times, it becomes second nature. You will stop even thinking about it and just make it.
I hope it becomes a staple in your kitchen the way it has in mine. If you try it tonight, please leave a comment below and tell me how it went — did you try the creamy version? The honey lemon glaze? I genuinely love hearing from you.
Happy cooking! — Mary